Who hasn’t felt the disappointment of videos ruined by jittery or shaky GoPro footage? The worst thing: It only happens sometimes and you can’t make out why.
Fortunately, there are several ways to prevent shaky GoPro footage and achieve smooth, stable shots reliably – without any accessories, complicated editing or drop in quality. Here are the steps you can take in order of ease and effectiveness:
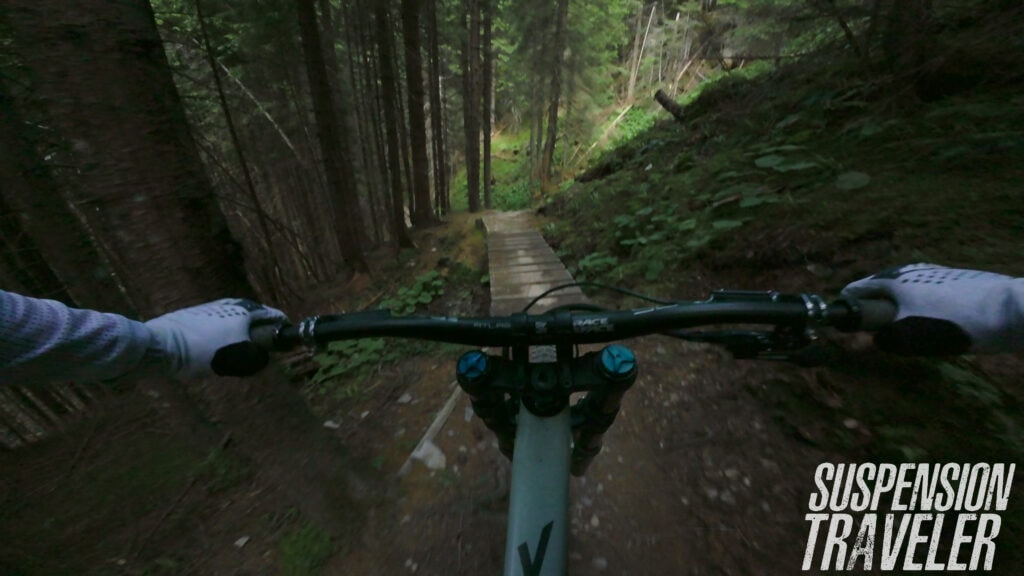
I filmed hundreds of Downhill POV videos (it often gets rowdy) for the Suspension Traveler YouTube channel and questions about how I achieve such a smooth style are among the most common – especially when it gets dark. That’s when jitters are very common.
Common Causes of Shaky Footage
Knowing why you get jittery videos is half the battle. The most common causes of shaky footage that we are going to solve are these:
- Fast camera movement: High-impact activities like Downhill MTB or simply handheld filming. But current action cams make short work of any fast movements. So this by itself is not a common issue anymore, but will become a problem if any other issues are added on top.
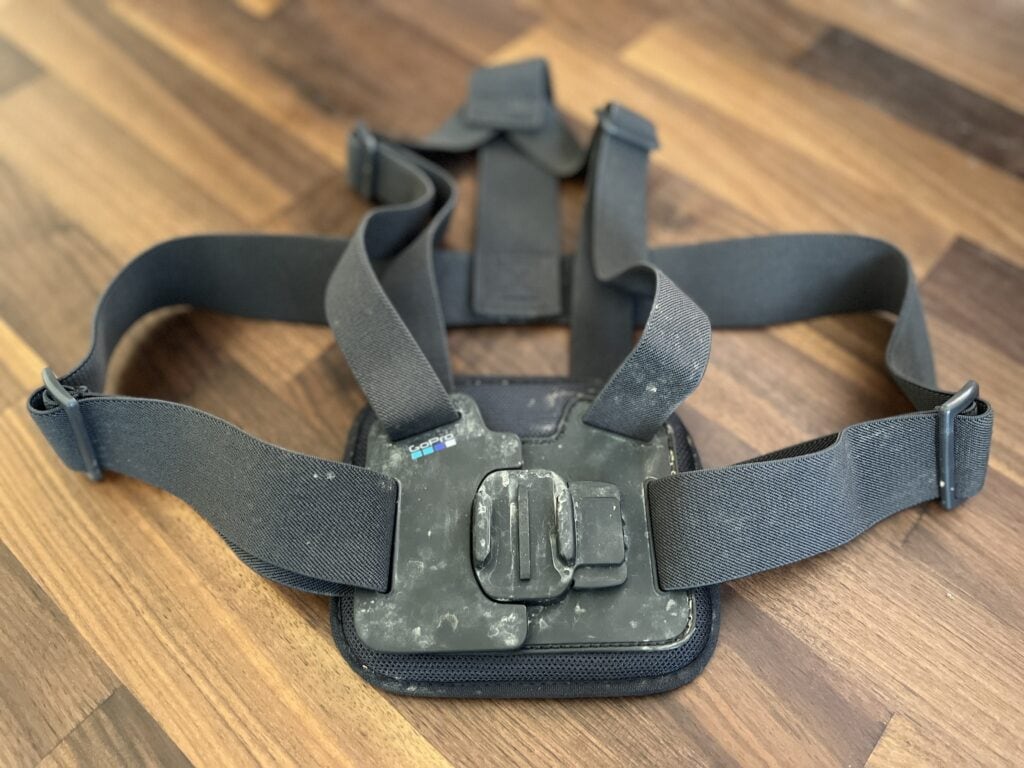
- Loose mounting: The actual camera mounts make a big difference. Handheld can be pretty stable and so are helmet mounts. Chest mounts get a lot more movement. Worst of all is a mount with a lot of play or wiggle room (i.e. loose chest straps).
- Vibrations: Fast vibrations from engines or other sources can cause your footage to be shaky (think handlebar mounts).
- Poor lighting: Filming in low light conditions can cause your camera to use slower shutter speeds, which can result in more motion blur and shakiness – because stabilization stops working.
Filming in low light or at night is one of the common reasons for blurry videos. If you’re experiencing that, simply copy my exact GoPro 12 low-light settings and DJI Action 4 night settings that you can use for yourself.
Increase the level of digital stabilization (Hypersmooth, Rocksteady etc.)
Built-in Electronic Image Stabilization (EIS) has many names. For GoPro it’s Hypersmooth, for DJI it’s Rocksteady and so on. All those software stabilization features basically work the same.
And there are a couple of common EIS options available to you, each with additional levels of stabilization:
- Off (no EIS, full FOV)
- On (Basic stabilization, enough for most activities)
- Boost (More stabilization, narrower FOV)
- Horizon Balancing (keeps horizon level, narrowest FOV)
So before we get into advanced tricks, check what level of stabilization you are rinning. And remember: More steady footage always comes at the cost of a narrower field of view (FOV) because the software has to crop in more to be able to stabilize more.
Reduce any movement within the mounting system
Other common mistakes are made when mounting the camera. There are mounting positions that are more stable than others (like the head via a helmet vs a chest mount).
And then there are issues that can introduce unwanted movement for any mounting option:
- loose chest mount straps
- loose chin mount
- wiggle room on an adhesive pad (no full contact)
- too long, flimsy telescopic selfie pole
- vibrating surface (motorbike tank or handlebar)
- vertical camera mounting increases leverage and bounce (like Action 4 or Insta360 X3)
Generally, the less mechanical movement on the camera, the less you are reliable on its software stabilization. When choosing an action cam mount, think about what type of footage you want to capture and what activities you’ll be doing.
Set the framerate to 30 fps to avoid jitters
A pretty common issue is the framerate setting at 60 FPS. It not only looks unnaturally crisp, and movement looks slow – it can also introduce jitters. Especially with movement in the shot. Staying away from 60 FPS will generally improve your footage and look less jarring.
Similarly, 24 FPS has a very harsh look as well that results in both motion blur and jitters – think of how war movies are often made. It’s a style that has an intentionally jarring feel.
The same is true for high shutter speeds, but that’s a more nuanced topic. Let’s get into it.
Set a minimum shutter speed of 1/240
Shutter speeds have probably the biggest influence on how shaky your footage is. On automatic settings, the camera slows down the shutter in low-light situation to make the image brighter.
Here is the deal: Electronic Image Stabilization requires sharp individual frames. In other words: Fast shutter and little blur.
While natural motion blur (shutter 1/60) looks cinematic,
stabilization only works with a fast shutter (1/240 and up).
This is why I set my action cameras to a minimum shutter of 1/360 if possible. On GoPros the next step is usually 1/480, which is very reliable in avoiding ghosting and shakiness even on rough MTB trails. 1/240 is usually enough for handheld filming.
However, GoPro does not allow setting a shutter speed range (as in MIN and MAX) – only a fixed value or completely variable. Unless you upgrade your firmware. Here is my guide on how to set shutter speed limits on your GoPro.
Increase maximum ISO
This method is less reliable (if the shutter is still automatic) and potentially results more grainy GoPro footage – since higher ISO means more noise.
I’d not use high ISO if you can avoid it. But if you don’t want to play around with firmware tricks, it’s an easy alternative.
ISO 1600 is usually plenty. Anything higher is reserved for night time GoPro shooting in my opinion.
Settings to use for reducing shakiness
Here’s a quick recap of the most important settings to stop jitters and shakes immediately:
- Hypersmooth (Auto)Boost stabilization or even HorizonLeveling
- 30fps Framerate for smoother footage
- Minimum shutter speed 1/480
- ISO 1600 or more
Mechanical stabilization by using a 3-axis gimbal
Now we’re getting into professional equipment and GoPro accessories. Which honestly isn’t necessary for most of us. But if you want to dial in your settings manually and use a slow shutter of 1/60 for cinematic motion blur, then you need to ditch EIS in favor of mechanical stabilization.
Now GoPro three-axis-gimbals aren’t very common anymore. Especially ones that can be mounted are extinct now. The current ones are rather handheld gimbals. These are designed to keep the camera steady, even when you’re moving around.
I do own a single-axis gimbal, but that’s not really helping with shakes – but rather makes them worse due to its weight. Gimbal stabilization has become something for handheld GoPro filming only.
Use additional software and gyro data in post-processing
If you are grasping for straws at this point there is still one method to try out. But we’re talking high input and low output here. GoPros up until the capture gyro data (used by Hypersmooth) that you can export and use with a editing software.
One that’s easy to use is GoPro’s own editing software (which is unfortunately paid now).
In order to make this work you need to film without Hypersmooth enabled and the run it through the software. This can result in better stabilization – but it works very similarly and will likely not get better results in most cases.
Horribly shaky footage is going to stay bad. So make sure to cover the steps above.
Don’t confuse shake with natural motion blur
One final word.
shutter of 1/480 will get good stabilization, even in the darkest spots. And it will result in some motion blur. But not all blur is equal. There is some we want and some we don’t want.
Things that move should get blurry (natural motion blur). The entire screen should not tho (shaky jitters).
So know which one you are looking at and when it occurs before spending time and energy to solve it (blur when moving fast and jitters in dark places).
