For GoPros, shutter speeds are the reason for stabilization working well, or falling apart.
You can set a fixed shutter, but that’s not going to work outdoors with changing lighting conditions. Instead, shutter limits are the better way. A must-have for any ND-filter user like myself.
However, GoPros don’t have that setting. Unless you use their official “GoPro Labs” software upgrade. This way I managed to get perfect stabilization in low-light. Every time.
Note: This software update cannot be done via the GoPro Quik app. It’s done through first-party “GoPro Labs” software which works on GoPro Hero 7 or newer. It allows you to enter more specific, professional-grade settings.
It simply adds additional firmware features and does not interfere with regular updates. There are no new menu options. Instead, setting input is done by creating QR codes and scanning them with your GoPro.
I’ll explain everything you need to know step by step.
Download GoPro Labs Firmware
Here is the link to the official GoPro Labs Firmware Download.
Pick your camera model from the downloadable files. And download the zip file to your computer.
Again, this adds on top of existing functionality. No features are taken away. Only added upon.
Normal firmware updates still work and nothing should break. You won’t have to reinstall the Labs Software after a normal firmware update via the Quik app.
Move files to SD Card
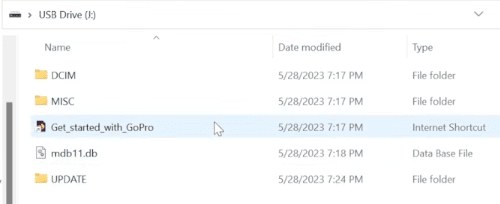
Next we need to get the files onto your GoPro’s memory card.
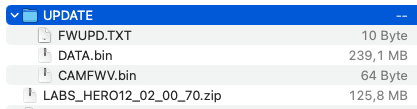
First, unzip the zip file you just downloaded. You should have a folder named “UPDATE” now.
- Remove SD card from your turned-off GoPro
- Insert it into the card reader slot of your computer or use an SD card adapter (link to the one I got)
- Copy the folder named “UPDATE” to the SD card (root folder)
- Safely remove the SD card
It should look like this:
Perform the Firmware Update
For this step, make sure your GoPro has at least 30% battery charge so that it doesn’t turn off during the update process.
After you inserted the SD card with the new firmware files into your turned-off GoPro it’s time to turn it on.
It will update by itself and reboot a couple of times. Just let it sit there and do its thing. You will get an “Update Complete” message when it’s done.
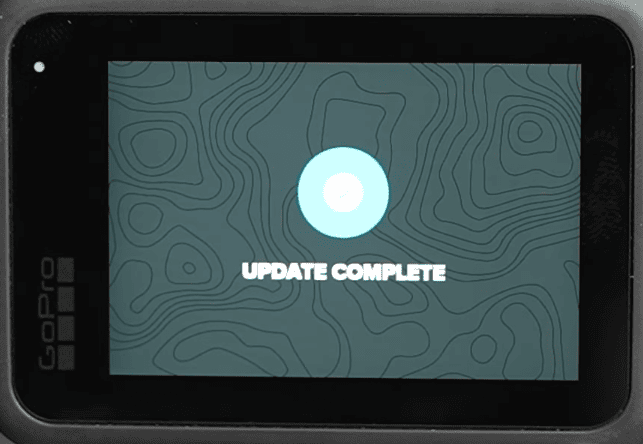
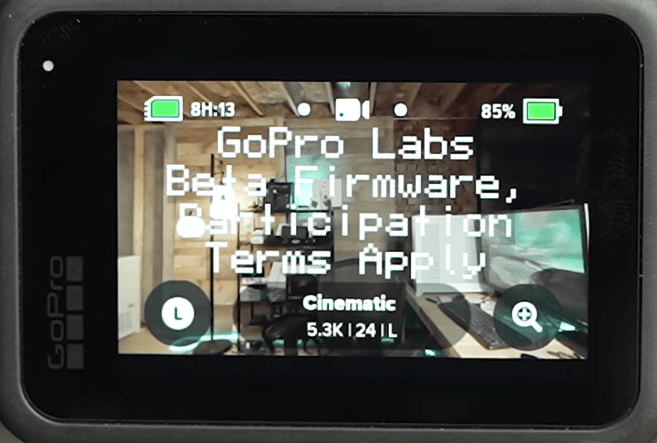
Additionally, you’ll see the “GoPro Labs Beta Firmware” overlay uopn every start up. This is the only way you’ll know that it is active.
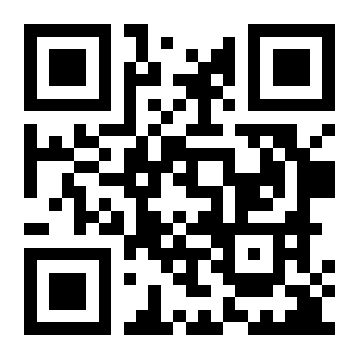
Program custom Settings with QR Codes
After successful installation, you can now program your own custom settings.
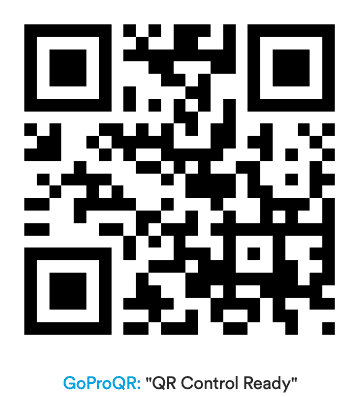
Since this beta firmware doesn’t add any menu options in the user interface, this is done using QR codes.
You can use GoPro’s Labs web tool or the QR Code Generator app for iOS and Android: https://gopro.github.io/labs/control/custom
The shutter options are a little hidden. You can use this link to get to them easily: https://gopro.github.io/labs/control/maxshut/
Using this you can set a maximum shutter angle (minimum shutter speed based on framerate) and maximum ISO.
Whatever QR code you scanned last for that particular feature (like shutter & ISO) is going to overwrite any existing settings. You can also choose whether the settings should stay after rebooting the camera.
I prepared my recommended custom settings for you to just copy by scanning the QR codes with your GoPro. The shutter speeds are based on a framerate of 30 FPS, but it works on 24fps or 25fps just as well. Not with 60fps tho.
Only for smooth handheld or helmet cam
Min Shutter 1/120
ISO Max 800
Good stabilization (for helmet or nighttime)
Min Shutter 1/240
ISO Max 1600
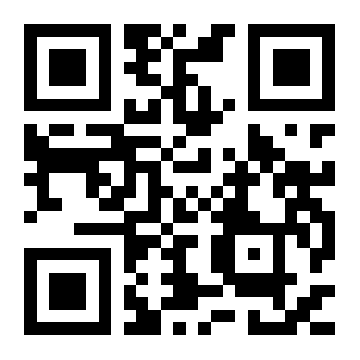
Stabilize anything (for chest mount & MTB)
Min Shutter 1/480
ISO Max 1600
TIP: Save this image as a screenshot or bookmark this page for easy access.
You will not see most of the settings from QR codes in the camera menu – simply because there is no option for Min/Max shutter for example.
They’re active but you won’t be able to check. The only indication is the Labs intro screen upon turning the camera on.
But you will see the improvement in your videos!
To reset everything within Labs firmware, simply use the Reset QR Code:
Next Steps
Now that you set up a few very specific settings, you may want to dial in the rest of your video options.
A shutter speed range is part of my own recommended cinematic GoPro settings for MTB (which includes my settings for filming with ND filters to get stabilized, motion-blurred GoPro footage).
It’s even more critical for low-light filming. Take a look at my GoPro settings for nighttime to get stabilized, noise-free footage at night.
